Showing posts with label gifts. Show all posts

Sunday, January 20, 2013

First We Had Each Other - Personalized Onesie Silhouette Cameo Heat Transfer Material Project

Our dear friends recently welcomed their baby girl, Olive, to the world. Jeff and Nicole had a co-ed baby shower in San Luis Obispo, CA which was airplane themed and so much fun. For Olive's gift, I purchased a crate from Michael's, stained it, painted it white, distressed it, then used my Cameo to cut out "Olive" in hot pink vinyl. I also added her monogram to the other side of the crate and gave it a coat of weather-proof varnish.

When it was finished, I filled the crate with all of my must-have baby items and the most adorable lace outfit and headband on earth (from this Etsy seller). On each gift, I taped a tag which said what the item was for and why I love it. 


Now that Olive is here, and we are going to visit her tomorrow for the first time, I decided to make her a little onesie using my Silhouette Cameo and Smooth Heat Transfer Material. 

I had an idea of what I wanted the onesie to look like. Olive's daddy is an airline pilot (I flew with him back when I was a flight attendant), so I searched for a cute airplane in the Silhouette Store and found this little fella for .99. For the back of the onesie, I created a design with the adorable saying, "First we had each other. Then we had you. Now we have everything." Seriously cute.

When I was satisfied with the design I did the most important step - Mirror the Image! I wasted a good 6 inches of material by forgetting this step on a previous craft - major bummer.


This is how the image looks mirrored. Since you'll be placing the image material side down, it will be right-side up when you iron it on.


After a couple of test cuts, I found this setting to be the most efficient for my machine: Smooth Heat Transfer, Speed 8, Thickness 14, Blade 1. No cutting mat.


Once cut, I slowly peeled the excess material off the plastic sheet to reveal the image.
Photobucket

I love the handy dandy hook tool and used it to pick the small pieces of extra material off the sheet. Side note - holy crap, the plastic sheet is sticky! And try not to touch the material too much or it will be tough to transfer.
Photobucket

Then I placed the image on the fabric and fired up the iron. I use the highest cotton setting on my iron. 

Photobucket

After a minute or two, I removed the protective sheet (which comes in the Heat Transfer box) and ironed directly on the plastic sheet for a few seconds. Also, after I carefully removed the plastic, I quickly pressed the iron over the material to give it a good seal. I'm not sure if this step is effective or not, it just makes sense to do it.

Photobucket

The curly letters were a bit tricky and wouldn't transfer right away. I allowed the plastic sheet to cool before attempting to peel it away and that worked. If you're working with chunkier letters, it is easier to take the sheet off when it is still warm. 

Photobucket

Here's the final result!

Photobucket

Photobucket

Photobucket

I've enjoyed the few times I've been able to use the Heat Transfer material. This morning my sister ran  in the Tinkerbell Half Marathon at Disneyland (along with 12,000 others). I made this EAT MY PIXIE DUST shirt (with Tinkerbell on the front) for her first 13.1mi race. Way to go, sis!


-Amanda

Saturday, January 12, 2013

Valentine's Day Mantle

Photobucket

Our little guy, Noah, was due on Valentine's Day in 2011. He ended up being born on the 15th but my point is, with a birthday party coming up in a few weeks, I didn't want to go overboard with Valentine's Day decorations. They will be replaced soon enough by a race car themed 2nd birthday party (which I haven't begun to plan - better get on that).

I had an extra canvas in my craft bin and after seeing this adorable DIY project from Craftoholics Anonymous, I decided that it's about time to fire up my Silhouette Cameo and see what it could do.

Turns out, I must be missing the vinyl talent because my version was less than perfect. I followed the directions exactly (and even used the mod podge trick) but when it came time to pull the stickers off I wasn't "left with a great looking love day decoration" as Linda claims. But she's a craft genius so I don't blame her for my unfortunate outcome.

Photobucket

Not one letter peeled off perfectly. I would normally trash a craft fail like this but I decided to just go ahead and spend a few minutes fixing it up.

Photobucket

Good from far, but far from good.

The next super easy craft for the mantle involved picking up heart-shaped doilies from the Target dollar section and stringing 5 of them from twine. Not much I could mess up with that. Although, they did come out of the package with a tear on the edge.

Photobucket

I balanced the mantle out with a seashell-filled vase, vintage books and letter G.

Photobucket

And called it a day.

Photobucket


Thursday, October 11, 2012

Paper Plate Pumpkin Craft

The first rain of the season fell early this morning. It seemed like an appropriate day to make an easy fall craft with the kids. They also needed some winding down after a fun morning of autumn initiation activities - puddle jumping and tree shaking.

{Pumpkin Plate Craft}
Paper Plate - Paint brush - Orange Paint - Construction Paper (green, brown, black) - Glue

I didn't have anything planned so I went with an old standby - paper plates. First, I read It's Pumpkin Day, Mouse, in which the mouse paints different faces on his pumpkins. Then I gave the kids a plate, brush and orange paint. While they worked at covering the entire plate orange, I asked them what face they wanted on their pumpkin (just like in the book) - happy, sad, surprised, silly or scary. They cut out the face, along with a stem and leaves. Then they glued the pieces onto their pumpkins. The leaves turned out to look more like unibrows, so you might want to try to glue crinkle paper on instead. 

Photobucket

Scary, Silly, and Surprised faces.
Photobucket

Noah loves all of Laura Numeroff's Mouse books.
Photobucket

As I said, the morning was spent puddle jumping and enjoying the cool air and cloudy sky.

Photobucket

My niece, Emma, is not afraid of getting dirty.
Photobucket

Noah, new to puddles, decided puddle slapping was much more entertaining. Whatever works, kid.

Photobucket

And there was tree shaking. The leaves aren't quite ready to fall. We only had a few takers, but a few was all we needed.

Photobucket

Welcome, fall. We are so glad you've arrived.
Photobucket


-Amanda

Thursday, July 26, 2012

Target 70% Toy Clearance July 2012

The pickens were slim for the annual summer toy clearance at Target. I didn't bring home a haul anything close to last year, but I was still able to find a few things on my list for Christmas.

My favorite item is the vtech talking puzzle marked down from $17.99 to $5.21. I also picked up a vtech ABC Text & Go game system for $4.18, two Belle Squinkies bracelet sets for $1.48, and a $44.38 Mega Bloks play table for $13.31. I noticed many Little People sets, My Little Pony, Barbie's and large play sets marked down to 70% off throughout the aisles.

On facebook this morning I read through several posts from Target shoppers who were waiting around for the mark downs to happen - you don't need to do that. I cruise the aisles for items I want and pile them in my cart. If they haven't been marked down, I take them to a scanning machine. Let's say I have a Princess doll marked as 30% off but it scans 70% off, I can then wait and ask an employee for a red tag sticker, or I can just take it to the register where it will ring up 70% off. If the item doesn't scan any lower, then you'll need to ask an employee to check it for you.

Hope you find some good deals today!

More Toy Clearance posts HERE.

-Amanda

Tuesday, May 22, 2012

Honeymoon Bridal Shower - Vintage Travel Theme

One of my dearest friends is getting married in June and I had the honor of throwing her a Honeymoon Shower in my backyard. First things first, the invitation "boarding passes" went out, setting the mood for the party. The invitations instructed guests to "Claim Megan's Baggage" for her honeymoon in St. Lucia and gave a list of gift ideas along with Megan's sizes. 


My vision for the party was soft colors and lace with travel and vintage touches. I searched through several thrift stores for old books and luggage. 

For the flower vases I used salsa and pasta sauce jars that I accumulated over a couple of months. The tea lights were placed in baby food jars and tied with twine.
Megan requested that we didn't play any traditional bridal shower games so I came up with a couple of other things for guests to do at the party, including "Help Megan Pack For The Honeymoon" and a stack of cards for guests to write Megan a note to read on the flight to St. Lucia. She is a very nervous flyer and was excited to have something to look forward to on the plane. 


The meal plan was for heavy appetizers. I decorated the table with vintage books and luggage (from Michael's) and used doilies to create the "Come Fly With Me" banner.


Drink stations are always one of my favorite parts of planning events. I purchased this little bathroom toiletry cart, which resembles an airplane beverage cart, from Target on clearance for $14.00. I set up the Mimosa jar on top of an amazing vintage World Atlas that I found at a thrift store and then added the mini bottles of wine and bottles of water.


The dessert table came together with just 4 glass containers holding cheesecake, cookies, brownies and chocolate-covered strawberries with a simple yard of lace fabric for the backdrop. 


I wanted to give Megan a special place to open her gifts. The gazebo in the yard was perfect! Mason jars filled with baby's breath and a chandelier framed the space. I fell in love with the "And They Lived Happily Ever After" pillow purchased at Marshall's.


The guests brought home mason jars with a mini bottle of lotion and trail mix. 


Another fun party that was a joy to put together! If you have any questions, just let me know either in the comments or email me at growingupgardner@yahoo.com.


-Amanda

Tuesday, March 20, 2012

from the archives: Peep Sushi and "To My Peeps" treats

An inexpensive way to put a smile on my face is easily done by handing me a pack of yellow Peeps. Last year we combined a couple of my favorite things - Peeps and Sushi to create these darling little bites of deliciousness. 
Check out more pictures and simple how-to instructions HERE
.

I used a free printable from Eighteen25 to make these little treats for my small group. To see how I put them together go HERE.

-Amanda

Wednesday, January 4, 2012

gift package upcycling

Isn't it fun to find new uses for old items? One of the easiest things to re-use is empty containers. They are the best for packaging baked goods. Mr. G recently made our church staff Oatmeal Raisin Cookies to say thank you for all of their hard work over the year. I used Mr. G's Muscle Milk container to package the cookies.
All I had to do was clean the container, take off the original label off and make one of my own.


Look around the house for things you can use the next time you plan on baking up some goodies. I found these in my pantry. Maybe they'll have a second use one day!


Just print out a cute little label or wrap some pretty scrapbook paper around it. Viola. A perfectly upcycled gift container.

-Amanda

Saturday, December 31, 2011

Target Christmas Clearance 70% off & Toy Clearance Info

The holiday items went 70% off today at Target! I love a good clearance run. My store in central California was just as stocked with 70% off items as it was at half off so I'm glad I held out. These clearance sales are perfect for getting every day items for very cheap (hand soap, kleenex, tape, etc) and for little gifts/stocking stuffers for next year. 
I squealed when I spotted the Night Before Christmas book!


Here's a break down of what I purchased:
For next year
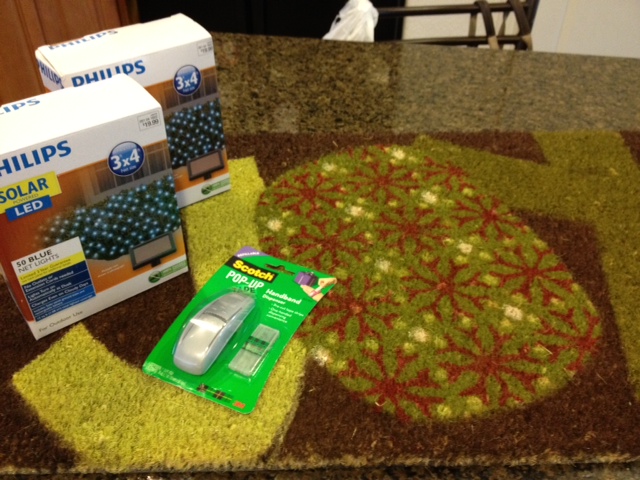
(2) LED net lights $5.99 each 
JOY door mat $3.89
Scotch hand tap $.60

 Gifts for next year
Santa Hand Towels $2.09
Lady Antebellum Christmas CD $2.09
The Night Before Christmas book $5.68 (reg. $18.95)
(2) Disney Princess 2-pack gloves $1.49 each
Star Wars lego $1.19
Cars 2 $1.49


For the home:
Kleenex $ .89
(2) Hand soup $.89 each
Scotch tape 3pack $.60
White ribbon $1.80
(2) bath sponges $.59 each (these are nicer than my $5 loofahs)

In the dollar section:
(4) notepads $.30 each
Cinderella bow $.30

Total spent $40.04
Saved $93.77


Here's a few pictures of what my store had this morning. There were also a ton of cards, plates, napkins, 7ft trees, stockings, and hand towels. Hopefully you can find some good deals at your Target.

The wrapping paper - I'm holding off for 90% off!
Ribbons, bows and gift bags
 Clothes, lights, misc.

The big 75% off Toy Clearance is coming in January. You can read what I picked up at 75% off in January 2011 here and what I got in July 2011 here. 
I'm only looking to get a few lego sets and the Little People Nativity Set for this coming clearance event. There are many lego sets at 30% off right now so I'm pretty confident that several will stick around and go half off and possibly 75% off. 

There are 3 aisles of clearance toys and about 8 end caps.


May 2012 bring many blessing to you and your family. Happy New Year!
-Amanda