My little man turned one! For his very first birthday Mr. G and I threw him a Radio Flyer wagon party! It was an absolute blast to create and it turned out classic and fun, just like Noah. I started several of the projects for the party back in January, DIYing almost everything. In this post I'll share the details of the party as well as how I used coupons and thrifty shopping to pull it together for less than $150.
The first thing I did was order the Little Red Wagon Party Package by Dimpleprints. The $30 package included the invitation and 167 pages of everything you can think of for throwing a party.
I'm excited to share the pictures from his big day with you...so here we go!

"Sweet Treats!" I made the cupcakes myself the morning of the party. Here's my secret to fantastic cupcakes - only use the butter cupcakes, in my opinion cupcakes made with oil don't turn out as moist. For fluffy frosting I get whipped vanilla frosting, put it in a bowl with a couple drops of vanilla extract, whip it for a minute and then pipe it generously onto the cooled cupcakes. Total for dessert - $5.

I received a coupon code from My Publisher for a free photo book and decided to write a children's book for Noah. I was a huge hit at the party. I read it to Noah every night before bed. He loves looking at the pictures of himself.

Mr. G's co-worker made these adorable red wagon cake pops. The wheels are M&M's and the wagon handle is black licorice. They were delicious!
The week before the party, Michael's released a 50% off coupon so Mr. G and I purchased most of the little filer items using that coupon. The brown paper crinkle was $2 - one bag goes a long way!

{Favors}
Get your own Official Radio Flyer License to Fly here!

A few weeks ago, Michael's also had a coupon for $5 off any purchase of $5 or more. I used it twice to purchase two packs of bubbles and 4 pinwheels for free!
The favors had bubbles, red licorice and a sucker. I bought the candy for half off the day after Valentine's Day. Total for all of the favors - 4 bucks!

"Thanks for Rolling By" tags from Dimpleprints. I also used the 2-inch wagon tags for the center of the pinwheels. And if you noticed the cute little pennant banner on the picture frame - I printed out a banner from the Dimpleprint package at 25%.

One picture from each month of his first year.

{Mantel}
The tiny pompom strings were the easiest things to make. I got out my sewing kit and thread the pompoms through the middle with a needle.
The pennant banner is another printable from Dimpleprints. I printed them out at 60% and put 2 on each page to save on ink and paper.

{Let's head outside}
The morning of the party I woke up and saw a dark sky and trees whipping back and forth. It was crazy windy and so, so cold. I prayed all morning for it to turn into a nice day and the good Lord answered my prayers. The wind calmed and it was a beautiful, sunny afternoon.
The set of 3 teal lantern balls were on clearance at Party Works for $4 and I ordered the mini Radio Flyer Wagon on Amazon for about 18 dollars - totally worth it!

We borrowed tables and chairs from my best friend's parents.

{Centerpieces}
These babies gave me a little headache. I knew exactly how I wanted the centerpieces to look but finding a teal tin bucket and red gerber daisies wasn't as easy as I thought it would be. I finally found the buckets at Michael's a couple of towns away for 30% off - $3 each and the daisies at JoAnn's for half off - total of $9. I wrapped the pinwheels with polkadot ribbon to compliment the scrapbook paper (4 for $1 at Michael's).

My sister throws incredible parties and has gathered many supplies from the shindigs she has hosted. This is great for me because I can call her up and say "Hey, sis, do you have ------?" The answer is usually yes. For Noah's party I borrowed her burlap table runners, teal and red platters and bowls, and cupcake stand.
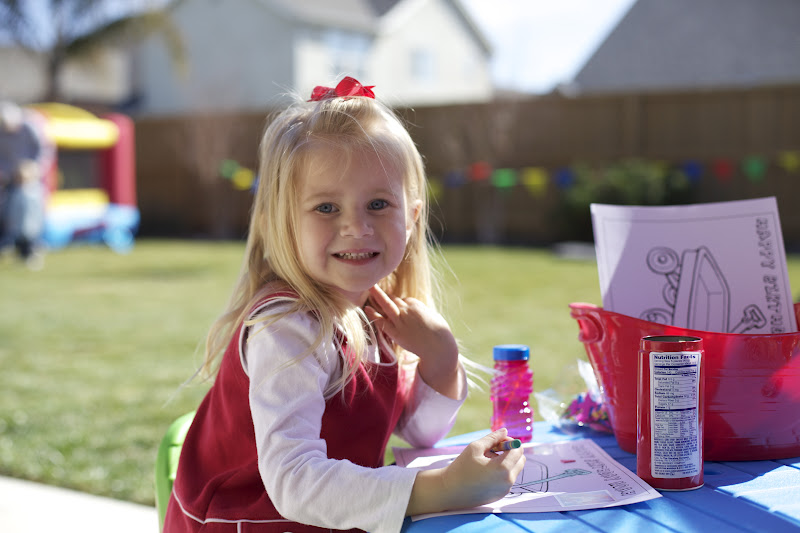
A fun craft table for the kiddies - coloring pages, stickers, crayons, foam shapes and bubbles.

{Food}
Burlap is a very cheap and useful fabric. The food table backdrop was one of the first things I planned. I wanted to hide the unattractive side yard and shield the food from the sun in a pretty way. My hot glue gun came to the rescue for this one. I glued twine to the top of the burlap and folded it over to create a "seam." The "Happy 1st Noah" banner is also from the Dimpleprints package.
I mentioned that it was windy in the morning - so windy that it was impossible to keep the table cloths (97 cents from Walmart) on the tables. My mom came up with the genius idea of tying the corners of the table cloths to keep them on.

I kept the menu simple for the party - hot dogs, fruit kabobs, "wagon wheels" (vegetarian), potato salad, and BBQ chips.
Can you spy the invitation on the table? I had them printed at Costco for $7.

I found the little white buckets at the dollar store. They come in a set of 3 and are labeled as favor containers. I stuffed them with paper crinkle and taped the food labels to cake pop sticks.


Silverware - folded napkin and a fork tied with twine.

{Drinks}
Lemonade, Strawberry Lemonade, Soda & Water
I wrapped almost everything I could with burlap and ribbon! It's all in the details :)

I love this little wagon! I had big plans for it to hold the hot dogs but somehow it ended up on this table and I didn't bother moving it.

A few of the gifts for the birthday boy!

Opening presents

{Happy Birthday, Noah}


{Cousins}
Ages 1, 2, 3 & 4!

{Family}

Noelle doing some coloring. She was such a big helper for mommy during the party.
Me and my sweet boy.

{Welcome}

The party was a few days after Valentine's Day and as I was removing the heart wreath from the door I got an idea. I wrapped leftover burlap around the wreath and tied the printable welcome sign from Dimpleprints around it. I can't believe it actually turned out cute!

-Amanda
Pin It
AWESOME party!!!! I love all your little details and the color scheme is great!
ReplyDeleteThanks, Shannon! It was a fun day :)
ReplyDeleteThis is absolutely beautiful! You did such a wonderful job pulling all the details together! Glad y'all enjoyed Noah's first birthday :)
ReplyDeleteYou did an amazing job!!!! I agree that it's the details that make it :) He is a lucky boy to have such a great mama!! Love the book idea, too! New Follow :)
ReplyDeleteWow! What a great idea and it looks like everything you did for the party turned out really great!
ReplyDeleteI love, love, love it! You are so talented!
ReplyDeleteEverything is so perfect. I love the thought that went into all the details. The colors are to die for too! Great work, fellow mama.
ReplyDeleteWhat a fun idea! I love the burlap wreath--simple and beautiful. I love all the fun banners you had around your house as well. Lots of good ideas here. Great job!
ReplyDeleteI love your picture banner and will be using it this year for my kids's parties. I found you on the Friday Blog Hop and I am now following.
ReplyDeletethis is great! happy birthday to him! (new follower from the Friday blog & google+ hop)
ReplyDeleteWhat a cute party and adorable pictures!! Happy to have you at Things I've Done Thursday!! www.bearrabbitbear.com
ReplyDeleteI love this happy party. So sweet. The details are great. I found you via sun scholars.
ReplyDeleteSuch a fun theme and your photos are great :)
ReplyDeleteLove this party! I was just wondering how you printed the banners out at 25%? Did you do this in adobe? Thanks :)
ReplyDeleteIn the Print settings I changed the scale percentage from 100% to 25% then clicked the tab button. Pushing return or hitting the Print button causes my printer to still print at 100%.
ReplyDeleteTo clarify:
Print > Scale 25% > Tab > Then Print Button
Would you mind sharing the coloring book page and how I can make my own. Also did you laminate the license to drive before the party? :)
ReplyDeleteI found the wagon on google images. You can take a screen shot of it (shift - command - 4) then bring that image into a photo editing site (ipiccy or picmonkey) and add the wording to it. Then print it out making sure that you click "use full page"
ReplyDeleteFor the licenses I used Scotch brand self-laminate pouches for business cards. I created them before the party and laminated them. The pouches are $2 for 5 at Target.
Thank you so much! Very helpful!
ReplyDeleteI just enjoyed reading your story. loved the details and the fact that it really is a bday party for kids to enjoy themselves and not a photo shoot. congratulations on your little guy's bday.
ReplyDeleteI am planning this theme for my little guy's first birthday in 3 weeks, and I LOVE the cake pops. Do you have a more specific recipe? I have only made cake pops once and they were round (used a cake pop maker). Not sure how to get them oval and how you did all the amazing details, but I want them for my son's party!!
ReplyDeleteGreat job!
Carole
inviteanddelight.blogspot.com
inviteanddelight@gmail.com
Hey! I am trying to plan my son's first birthday party. Do you mind telling me how you made his picture banner? :)
ReplyDeleteHi Amanda - All I did was cut cardstock in 2 rectangle shapes, one small and one large. Then glued the small rectangle onto the large rectangle and used double-sided tape to stick the photo on. I used a hole punch to put two holes on each large rectangle (top corners) and strung ribbon through. Hope this helps!
DeleteAmanda